When I was contacted by Mark
Lipski of Traction Control Braking about
trying their brake banjo bolt replacement
that they said would help stop my brakes
from locking up I said, “Yeah, sure! How is
a bolt going to do that?”
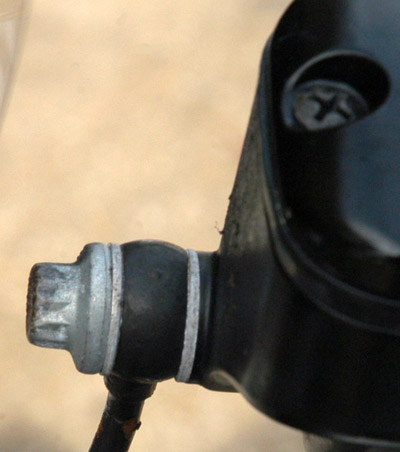
Mark explained the bolt is
separated into two chambers by a rubber
diaphragm. The top one is filled and sealed
with air and the bottom chamber has an
opening that allows brake fluid to fill it,
so when the brakes are applied, there is a
sort of shock absorber action of the pads on
the rotor. That made sense to me but I still
had some doubts, so I agreed to try one out.
If I decided I didn’t like it, it would take
only a few minutes to go back to my old
system.
I ordered the one for a
Harley FLHTI but they are available for most
makes and models of motorcycles and they
even have units for ATVs, scooters and
snowmobiles.
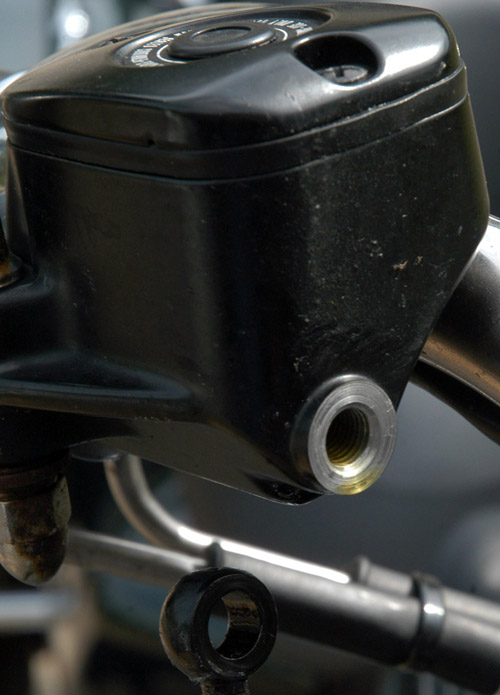
When the unit arrived, I
noticed that it did not have any brake
washers with it. I had some in the parts
bin, so that was not a problem. I mentioned
it to Mark when he called to see if I had
received the unit. He said they would start
adding them to the kit. Cool.
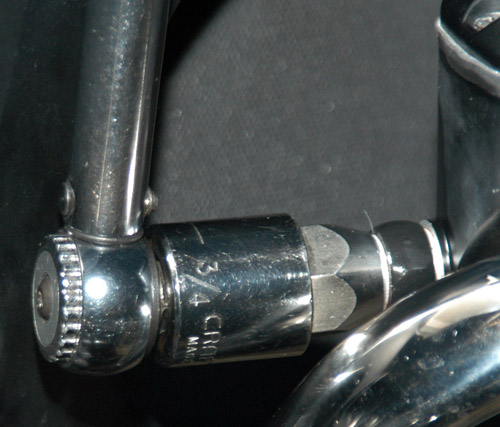
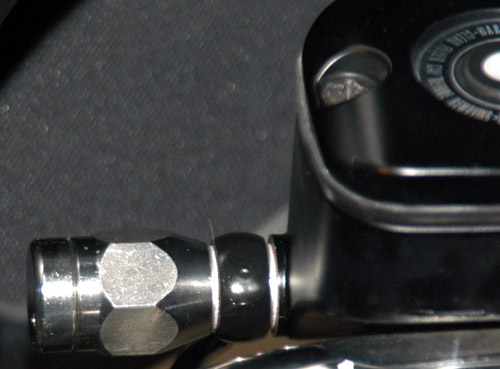
Now to put this baby on.
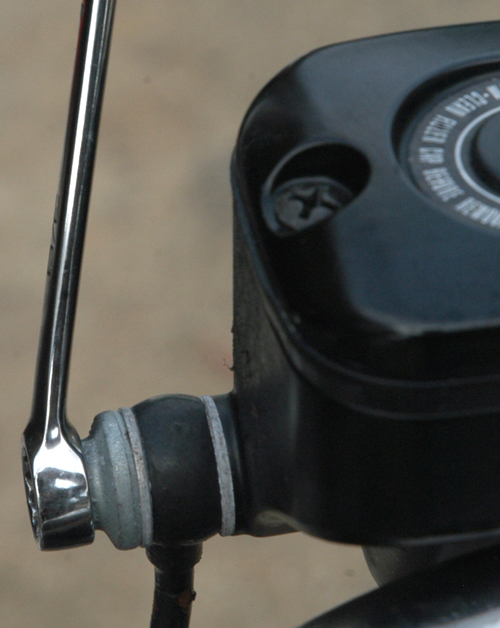
Using a 3/8-in. 12-point box
end wrench, I removed the stock banjo bolt.
I placed a shop towel under the master
cylinder just in case any fluid leaked. It
didn’t.
I installed a new crush
washer on the bolt and slid it through the
banjo, added another between the banjo and
master cylinder and proceeded to thread the
unit in by hand to make sure it was not
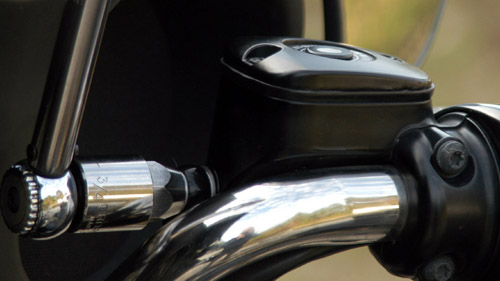
cross-threaded. I then used a 3/8-in. drive
¾-in. shallow socket because of clearance. I
am a firm believer in torque wrenches and I
used one set at 230 in.-lb (factory
recommends 204-264 in.-lb) to tighten the
bolt.
The job was easy and went
very quickly. I decided to pump the brake
lever very quickly at about half throw to
see if the system would bleed back through
the master cylinder. I did this a few times
and I had a good brake. Note that if you try
this method, you need to be careful that you
get all the air out of the system. If after
sitting, the lever comes in and then pumps
up, you still have air in the system and may
need to bleed at the caliper. You must make
sure there is no air in the system.
I checked the master cylinder
for fluid level and was satisfied.
I went for a ride to test the
brake. I noticed the improved stopping
immediately. I increased the speed and
continued to apply more brake, stopping the
motorcycle in shorter distances and not
locking the wheel.
The following day, I had an
unexpected opportunity to really try out my
brakes when a car pulled out in front of me.
They worked great!
No, I am not going to take it
off. I LIKE IT!
I put one on my friend’s
Harley Road King and he is impressed with
it, too. In the case of the Road King with a
windshield, the clearance was a little
close. We chose to lightly sand the edge of
the windshield, instead of adjusting the
handlebars to gain clearance. Minor
adjustments may be necessary to some models
with windshields.
To find out more about the
TCB Device or to order one, go to their
website
http://www.tcbbrakesystems.com/.
You can also phone them at 886-682-2822